Soy Wax Melts: Beginner Guide & EO Recipes
By City Self-Sufficiency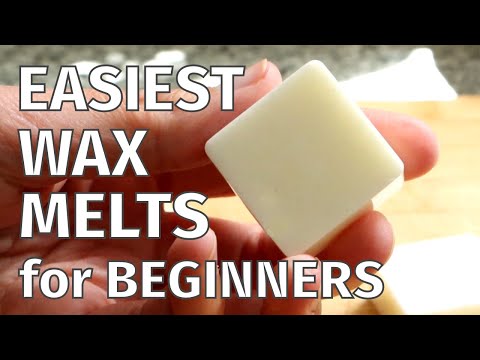
TL;DR: Crafting soy wax melts is an easy and accessible project for beginners using natural ingredients and basic tools.
- Beginner-friendly method for making soy wax melts.
- Utilize natural soy wax flakes and essential oils.
- Controlled heating prevents scorching wax.
- Cool wax before adding fragrances.
- Customize scents with various essential oil blends.
Why it matters: Making your own soy wax melts offers a sustainable and personalized alternative to commercial air fresheners, promoting a healthier home environment.
Do this next: Gather soy wax flakes and a heat-resistant container to prepare for your first batch of wax melts.
Recommended for: Individuals seeking an accessible and eco-friendly introduction to crafting natural home fragrances.
This guide provides a straightforward approach to creating soy wax melts, suitable for individuals new to crafting. The process emphasizes simplicity and utilizes readily available materials, making it an accessible project for beginners. The primary components are soy wax flakes, which are a natural and renewable resource, and a heat-resistant container for melting.
The initial step involves accurately measuring the soy wax flakes. The quantity will depend on the desired number and size of the wax melts. A general recommendation is to start with a manageable amount, such as a cup or two, to familiarize oneself with the process. Once measured, the soy wax is placed into a heat-resistant container, such as a double boiler or a microwave-safe bowl. The double boiler method is often preferred as it provides more controlled heating, reducing the risk of overheating the wax. If using a microwave, short intervals of heating, typically 30-60 seconds, are advised, with stirring in between to ensure even melting. The goal is to achieve a completely liquid state without scorching the wax.
Once the soy wax has fully melted and is clear, it's crucial to allow it to cool slightly before adding any fragrances. Adding essential oils or fragrance oils to excessively hot wax can cause the scents to evaporate prematurely, diminishing their strength in the final product. A good indicator for the correct temperature is when the wax begins to show a slight film on the surface or when a thermometer reads around 180-185°F (82-85°C).
At this stage, the chosen essential oils or fragrance oils are incorporated. The guide offers several essential oil blend suggestions, catering to different aromatic preferences. For instance, a relaxing blend might include lavender and chamomile, while an invigorating blend could feature citrus oils like lemon and orange with a hint of peppermint. The amount of essential oil to add is typically a small percentage of the wax's weight, often between 6-10%. It's recommended to start with a lower percentage and gradually increase if a stronger scent is desired, as too much oil can sometimes affect the wax's ability to solidify properly or cause it to "sweat" oil. After adding the oils, the mixture should be gently stirred for a minute or two to ensure the fragrance is evenly distributed throughout the wax.
The final step involves pouring the scented wax into molds. Silicone molds are highly recommended due to their flexibility, which makes it easy to remove the solidified wax melts without breakage. Various shapes and sizes of molds can be used, from simple cubes to more intricate designs. Once poured, the molds should be left undisturbed at room temperature to cool and solidify completely. This process can take several hours, depending on the size of the melts and the ambient temperature. Rushing this step by placing them in a refrigerator or freezer is generally not advised, as it can lead to uneven cooling and potential cracking or frosting of the wax.
After the wax melts have fully hardened, they can be carefully removed from their molds. They are then ready for use in a wax warmer or oil burner. For storage, an airtight container is recommended to preserve their fragrance and prevent dust accumulation. This simple, step-by-step method allows beginners to successfully create their own custom soy wax melts, offering a natural and customizable alternative to commercially produced air fresheners. The emphasis on natural ingredients and the straightforward process aligns with a self-sufficiency approach to household items.
Source: youtube.com
Related Analysis
- Homeowners Retrofit Properties with Renewable Energy Solutions — Renewable energy retrofitting gains traction as regenerative agriculture principles inform home upgrades. Experts point …
- New Practices Build Climate-Resilient Cob Homes — Cob construction emerges as a key strategy in enhancing resilience against ecological challenges in permaculture systems…
Explore more in Shelter, Energy & Infrastructure — the full hub for this knowledge area.