DIY Seed Snails: Build Yours for Easy Germination
By Self Sufficient Homesteading & Gardening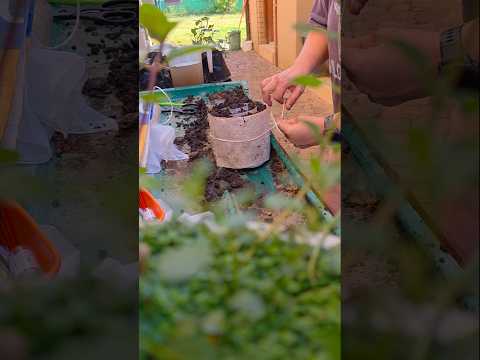
TL;DR: Create DIY seed snails from paper towels and plastic containers for efficient seed germination, especially beneficial for small seeds and limited spaces.
- Seed snails optimize germination in small spaces.
- Gather essential materials: container, paper towel, spray bottle, seeds.
- Place seeds precisely on paper towel; roll tightly.
- Maintain consistent moisture for successful sprouting.
- This method aids organization and observation of growth.
Why it matters: This method offers a simple yet effective way to manage seed germination, particularly useful for gardeners with limited space or those looking to improve germination rates for small seeds, leading to healthier seedlings and more successful harvests.
Do this next: Gather materials and construct your first seed snail to test the method with your preferred seeds.
Recommended for: Home gardeners, urban dwellers, and anyone looking for an efficient seed germination technique, especially for small seeds or limited spaces.
This article provides a detailed guide on constructing seed snails, a practical method for organizing and germinating seeds, particularly beneficial for small seeds or when space is limited. The process begins with gathering the necessary materials: a plastic container with a lid, a roll of paper towels, a spray bottle filled with water, and the seeds themselves. The author emphasizes the importance of selecting a container that is appropriately sized for the number of seeds to be germinated, suggesting that clear plastic containers are ideal as they allow for easy observation of the germination process.
The first step in building a seed snail involves preparing the paper towel. A single sheet of paper towel is laid flat, and a thin line of seeds is carefully placed along one long edge. The author recommends leaving a small margin from the edge to prevent seeds from falling out during the rolling process. For very small seeds, a pair of tweezers can be helpful for precise placement. The spacing between seeds is crucial; it should be adequate to allow for root development without overcrowding, typically about half an inch to an inch apart, depending on the seed size.
Once the seeds are positioned, the paper towel is gently rolled up, starting from the edge with the seeds. The goal is to create a compact, spiral-shaped roll, resembling a snail shell, with the seeds nestled within the layers of paper towel. As the rolling progresses, it's important to maintain a consistent tension to ensure the seeds remain in place and the roll is firm. After the paper towel is fully rolled, a rubber band or a piece of string can be used to secure it, preventing it from unraveling.
The next stage involves placing the seed snail into the prepared plastic container. The author advises adding a small amount of water to the bottom of the container, just enough to keep the paper towel consistently moist without submerging it. The seed snail is then placed upright in the container, allowing the bottom edge of the paper towel to absorb water. The lid is then secured on the container, creating a mini-greenhouse environment that helps maintain humidity and warmth, both critical factors for successful germination.
Labeling is presented as an essential step to avoid confusion, especially when germinating multiple types of seeds. The author suggests writing the name of the seed and the date of planting directly on the paper towel roll with a permanent marker, or attaching a label to the outside of the container. This ensures easy identification of seedlings once they emerge.
Monitoring the seed snails regularly is highlighted as crucial. The article recommends checking the moisture levels daily and misting the paper towel with the spray bottle if it appears dry. Overwatering should be avoided, as it can lead to mold growth or rot. The author also advises observing the seeds for signs of germination, which typically involves the emergence of a small root.
Once the seeds have germinated and developed a small root, they are ready for transplanting. The article suggests carefully unrolling the paper towel and gently removing the seedlings. The delicate nature of young seedlings means they should be handled with care, ideally by their leaves rather than their stems or roots, to minimize damage. They can then be transplanted into individual pots or directly into a garden bed, depending on the plant's requirements and the local climate.
The article concludes by reiterating the benefits of using seed snails, such as efficient use of space, easy monitoring of germination, and a reduced risk of damping-off disease due to better air circulation compared to traditional seed trays. This method is particularly recommended for gardeners with limited space or those who wish to germinate a large variety of seeds in a controlled environment.