Indoor Seed Starting: Lights, Soil & Success Guide
By Epic Gardening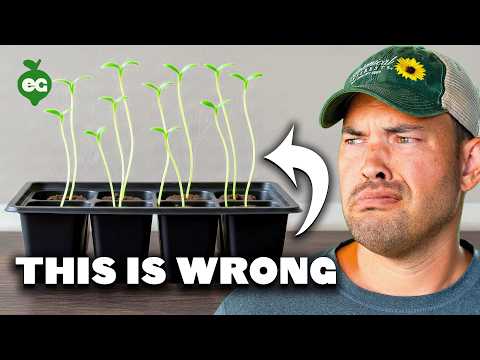
TL;DR: Starting seeds indoors under lights gives plants a head start, optimizing growth and health before transplanting.
- Choose viable seeds suited to your climate.
- Use seed-starting trays with drainage.
- Sterile seed mix prevents disease.
- Fluorescent or LED lights are effective.
- Provide 12-16 hours of light daily.
- Adjust lights 2-4 inches above plants.
Why it matters: Indoor seed starting extends the growing season and produces robust seedlings, especially in challenging climates, improving garden success.
Do this next: Watch the complete guide to learn specific light, temperature, and moisture requirements for your chosen seeds.
Recommended for: Anyone looking to cultivate healthier plants from seed, gaining control over their gardening schedule and outcomes.
Starting seeds indoors under artificial lights is a highly effective method for gardeners to get a head start on the growing season, especially in regions with shorter warm periods or unpredictable weather. This approach allows for greater control over the germination and early growth stages of plants, leading to stronger, healthier seedlings ready for transplanting outdoors.
The initial step involves selecting the appropriate seeds. It's crucial to choose seeds that are viable and suited to your local climate and growing conditions. Understanding the specific light, temperature, and moisture requirements for each type of seed is paramount. Some seeds require stratification (a period of cold treatment) or scarification (nicking the seed coat) to break dormancy, while others germinate readily with just warmth and moisture.
Next, gathering the necessary equipment is essential. Seed-starting trays or individual pots are fundamental. These should have drainage holes to prevent waterlogging, which can lead to damping-off disease. A sterile seed-starting mix is preferred over garden soil, as it's lighter, drains better, and is free from pathogens and weed seeds. Peat-based or coir-based mixes are common choices. Labels are also important for keeping track of different plant varieties.
The lighting setup is a critical component of indoor seed starting. While various options exist, fluorescent lights (T5 or T8) are a popular and cost-effective choice for home growers. LED grow lights are another excellent option, offering energy efficiency and a broad spectrum of light tailored for plant growth. The key is to ensure the lights provide sufficient intensity and duration. Seedlings typically require 12-16 hours of light per day. The lights should be positioned close to the seedlings, usually 2-4 inches above the plant tops, to prevent them from stretching and becoming leggy. As the seedlings grow, the lights should be adjusted upwards to maintain this optimal distance.
Planting the seeds involves filling the trays or pots with the seed-starting mix, gently moistening it, and then sowing the seeds according to their specific depth requirements. Generally, seeds are planted at a depth roughly twice their diameter. After planting, a thin layer of vermiculite or more seed-starting mix can be used to cover them. Misting the surface helps settle the seeds without disturbing them.
Maintaining the right environmental conditions is crucial for successful germination and early growth. Temperature plays a significant role; most seeds germinate best in a warm environment, often between 65-75°F (18-24°C). Heating mats can be used to provide bottom heat, which significantly improves germination rates for many species. Humidity is also important, especially during the germination phase. Covering the trays with a clear dome or plastic wrap can help create a mini-greenhouse effect, retaining moisture. Once seedlings emerge, good air circulation is vital to prevent fungal diseases. A small fan can be used to gently move air around the seedlings.
Watering should be done carefully to avoid overwatering or underwatering. The seed-starting mix should remain consistently moist but not soggy. Bottom watering, where trays are placed in a shallow pan of water to allow the mix to absorb moisture from below, is an effective method that prevents disturbing delicate seedlings.
Once seedlings develop their first set of true leaves (the leaves that appear after the initial cotyledons), they can be fertilized with a diluted, balanced liquid fertilizer. It's important to start with a very weak solution to avoid burning the young plants. As they grow, the concentration can be gradually increased.
Thinning is often necessary to ensure adequate space and resources for the strongest seedlings. If multiple seeds germinate in one spot, the weaker seedlings should be carefully snipped off at the soil line, leaving the most robust one to grow.
Before transplanting seedlings outdoors, a process called "hardening off" is essential. This gradually acclimates the young plants to outdoor conditions, including direct sunlight, wind, and fluctuating temperatures
Source: youtube.com
Related Analysis
- Farms Build Resilience, Pivot to Regenerative Soil — New initiatives and analysis explicitly frame regenerative agriculture as a direct solution for climate resilience, focu…
- Federal Policy Pivots, Builds Indigenous Agriculture Frameworks — Federal policy trends are integrating Indigenous knowledge with soil science in regenerative agriculture, shifting polic…
Related on PermaNews
- Berlins schwimmende Gärten: Permakultur auf dem Wasser (Case Study)
- Traditional Seed Saving: Crop Diversity & Resilience Secrets (How-To Guide)
- Milkwood: Build a Seed Bank – Save Tomato & Cucumber Seeds (Video)
- Seed Saving Mastery: Permaculture's Genetic Diversity Key (How-To Guide)
- Seed Saving: A Revolutionary Act for Biodiversity & Food (Article)
- We Grow Urban Farm: Regenerative Urban Agriculture Case Study (Video)
Explore more in Food Systems & Growing — the full hub for this knowledge area.