Grow Easy Potatoes: 5-Step Garden Guide
By Permaculture facile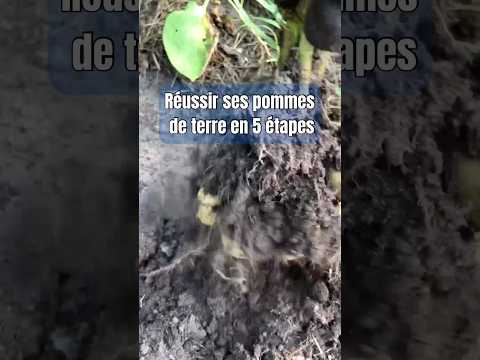
TL;DR: Growing potatoes can be a rewarding experience when following a few simple steps, from selecting seed potatoes to proper care and harvesting.
- Choose certified disease-free seed potatoes for best results.
- Chitting seed potatoes encourages earlier and larger yields.
- Plant in well-drained, sunny soil rich in organic matter.
- Bury seed potatoes 4-6 inches deep, spaced adequately.
- Ongoing care ensures successful potato harvest.
- Cut large potatoes into pieces with 1-2 "eyes" and dry before planting.
Why it matters: Understanding the stages of potato cultivation, from preparation to harvest, can significantly improve yields and ensure a successful crop, even for beginners.
Do this next: Obtain certified seed potatoes and begin the chitting process in a cool, well-lit area.
Recommended for: Beginner gardeners interested in growing potatoes from scratch with clear, actionable steps.
Cultivating potatoes can be a straightforward and rewarding endeavor, even for those new to gardening. The process can be broken down into a few key stages, starting with the selection and preparation of the seed potatoes, moving through planting, ongoing care, and finally, harvesting and storage.
The initial step involves acquiring suitable seed potatoes. These are not the same as potatoes purchased for consumption from a grocery store, as commercial potatoes are often treated to inhibit sprouting. Instead, gardeners should seek out certified disease-free seed potatoes from a reputable supplier. Once obtained, these seed potatoes benefit from a process called "chitting" or sprouting. This involves placing them in a cool, well-lit area for several weeks before planting. The light encourages the development of short, sturdy sprouts, which can lead to earlier and larger yields. While chitting is beneficial, it's not strictly mandatory; potatoes will still grow without it, but the process can give them a head start.
The next crucial stage is preparing the planting site. Potatoes thrive in well-drained, loose soil that is rich in organic matter. A sunny location is also essential, as potatoes require ample sunlight for optimal growth. Before planting, it's advisable to amend the soil with compost or well-rotted manure to improve its fertility and structure. This provides the necessary nutrients for the developing plants.
When it's time to plant, typically in early spring after the last frost, the prepared seed potatoes are placed into the soil. If the seed potatoes are large, they can be cut into smaller pieces, ensuring that each piece has at least one or two "eyes" or sprouts. These pieces should be allowed to dry for a day or two before planting to prevent rot. They are then planted about 4-6 inches deep and spaced approximately 12-15 inches apart in rows, with rows themselves being about 2-3 feet apart.
Ongoing care is vital for a successful potato harvest. A key practice is "hilling," which involves mounding soil around the base of the growing plants as they emerge. This serves several purposes: it protects the developing tubers from sunlight, which can turn them green and inedible, and it encourages the formation of more potatoes along the buried stem. Hilling should be done progressively as the plants grow, typically two or three times throughout the season. Consistent watering is also important, especially during flowering and tuber development. Potatoes require about 1-2 inches of water per week, either from rainfall or irrigation. Weeding is another essential task to prevent competition for nutrients and water.
Finally, harvesting and storage mark the culmination of the growing season. Potatoes are typically ready for harvest when the foliage begins to yellow and die back, usually 2-4 weeks after the plants have finished flowering. For "new potatoes," a smaller, more tender harvest can be made earlier by carefully digging around the plants. For mature potatoes, it's best to wait until the tops have completely died down. Digging should be done carefully with a fork or spade to avoid damaging the tubers. After harvesting, the potatoes should be allowed to cure in a cool, dark, well-ventilated area for a week or two. This process toughens their skins and improves their storage life. Once cured, they can be stored in a cool, dark, and humid environment, such as a root cellar or unheated basement, where they can last for several months.
Source: youtube.com
Related Analysis
- Farms Build Resilience, Pivot to Regenerative Soil — New initiatives and analysis explicitly frame regenerative agriculture as a direct solution for climate resilience, focu…
- Federal Policy Pivots, Builds Indigenous Agriculture Frameworks — Federal policy trends are integrating Indigenous knowledge with soil science in regenerative agriculture, shifting polic…
Related on PermaNews
- Anywhere Potatoes: Easy Container Gardening Tips (Video)
- Kartoffeln: Ertrag verdoppelt! Neue Anbaustrategie enthüllt (Video)
- Potato Planting Times: Northern & Southern Hemispheres (Video)
- Flawless Potato Planting: Guide to Prep, Germination & More (Video)
- Sprout Sweet Potatoes Easily: Your Guide to Slips (Video)
- December Planting Guide: Northern Hemisphere Garden Prep 🌱 (Video)
Explore more in Food Systems & Growing — the full hub for this knowledge area.